Quoting Booklets

Contents
Overview
In every profession, some chores just naturally gravitate toward the bottom of the in-pile. They're the projects we approach with the same enthusiasm as filling out income tax forms or cleaning out the garage. In printing, that award goes to estimating the cost of booklets. I've never met a shop owner who was eager to sit down, reach for a calculator, and work up a booklet quote.
Thanks to Morning Flight's booklet module, that's now history. We've managed to squeeze the entire process into three simple steps:
1.Specify the size of the booklet.
2.Select the type of binding, including trim.
3.Gather up the cover and contents.
Pricing the cover and contents is basically the same as pricing letterheads and postcards. Except here, the sheet size has to precisely fit the size, type, and trim of the booklet. That part has become a walk in the park, because the booklet module will tailor the sheet size for you.
Does that mean pricing a booklet will now be the first project you'll want to tackle when you walk into the office on a Monday morning? Probably not. But neither will it be the last.
Setting the Size and Type
1.![]() From the main menu, click the Booklet Quote button.
From the main menu, click the Booklet Quote button.
2.Click the F2 button, then enter the Name.
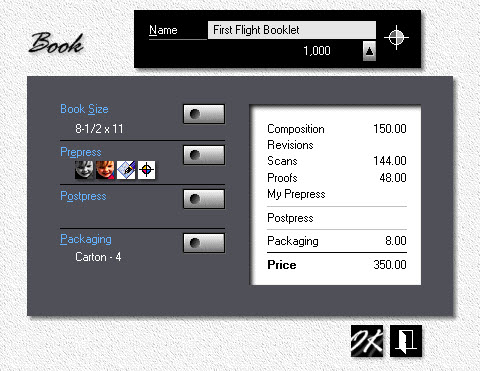
3.Click the Book Size button and select 8-1/2x11 (or A4).
![]()
To change the booklet's format from portrait to landscape, enter the long dimension first, or just click on the size. The yellow bullet tells us it's landscape.
4.Click the Prepress Button.
5.Check Composition, then enter 2 hours and 30 minutes. Composition and other prepress charges entered here are for the entire booklet.
6.Enter black/white and color scans as shown. The quick way is Jet-Entry: 521 in the B/W Scans box, and 001 for Color Scans.
7.Check Proofs and enter $48.00, then click OK.
8.Click OK to accept the product window.
9.Back in the quote window, click F3 and select Spiralbound. Click OK.
Entering the Covers
Booklet covers fall into two categories: Folded covers for staddlestitched and perfect bound booklets, and flat covers for everything else. Regardless of type, the size of the cover is tied to the size of the booklet, so that's not something the program will let you change. What you can do, with folded covers, is print them 2-up by enlarging the press sheet. That will affect the price and press run, though not the page count. It's unlikely you'd want to wrap any booklet into more than one set of covers.
Flat covers, the type used for spiral, wire, and GBC bound booklets, are different. Here, when you make the press sheet big enough for a 2-up run, the program assumes you're going to cut the front and back covers out of the same press sheet. Consequently, the entry box for the back cover goes away, along with any back cover specs you may have entered.
1.In the quote window, click F4.
2.Check Front Cover, then enter any configuration suitable for a booklet cover.
3.Check Back Cover, and enter the configuration for that.
Assembling the Contents
Each booklet can have up to three different containers for book pages. Let's assume most of the pages are printed in black ink. Those pages will all go into our first container. Color pages go into the second. And a reply card, an insert, gets dropped into the third. Just so you know, the sequence doesn't really matter.
4.Check Contents 1, then enter the configuration for inside pages printed in black ink.
5.Check Contents 2, and enter the configuration for inside pages printed in color. Let's make the press sheet size twice the size of the product so the signature will print 2-up.
6.Click OK to close the window.
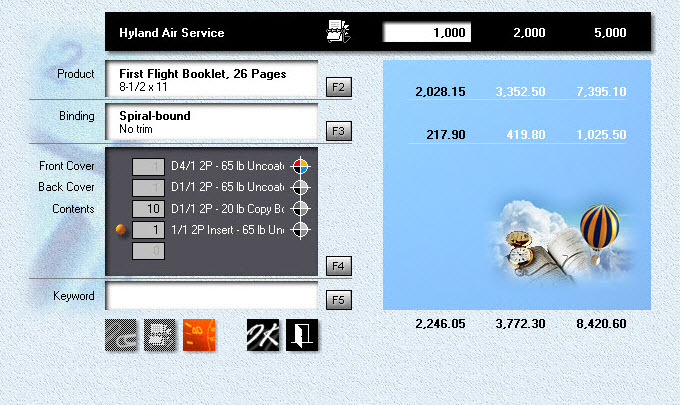
7.Back in the quote window, you'll find entry boxes for each container. Enter 10 in the first box for Contents, 2 in the second. Those numbers tell the program how many signatures we're putting into each container. More specifically, how many 1-up, 2-up, or 4-up signatures with the same ink colors, and on the same paper, we need to print.

Adding an Insert
What's an insert, and how do we enter it? Inserts are reply cards, carbonless forms, things that don't meet the criteria for a standard book page. You can designate any container as an insert by checking the white bullet box. Two things happen when you do that. First, you're now free to pick any size. Second, you're locking in the page contribution: Four pages for saddlestitched and perfect bound inserts, two pages for spiral, wire, and GBC. That's different from signatures. There, when you double the size of the press sheet, you double the page contribution.
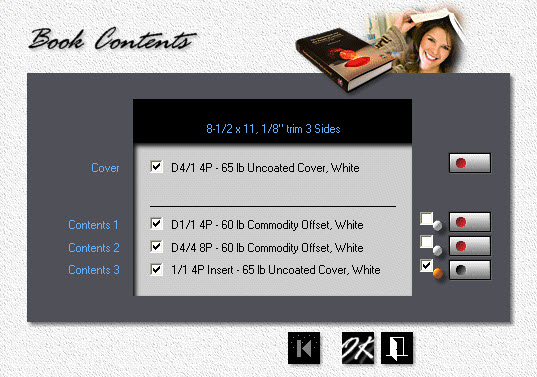
Let's assume you're quoting 1,000 saddlestitched booklets, 8-1/2x11. If "Contents 2" contained 11x17 signatures, those signatures would each contribute four pages. Increase the signature size to 17x22, and the page contribution for Contents 2 becomes eight (shown as 8P below). Morning Flight will maintain the press-run count for those signatures at 1,000. Had they been entered as a 2-up insert, the program would have reduced the press-run count to 500. At 2-up, that would still have given us 1,000 inserts.
1.In the quote window, click F4.
2.First check a box next to a white bullet, then click the adjacent button.
3.Enter the configuration for the insert. A large postcard will do.
4.Click OK to accept the book contents window.
To sum up ...
No matter how many up you run them, covers and inserts will always maintain the same page count: Four pages for saddlestitched and perfect bound booklets, two pages for everything else. Yet regardless of how the booklet is bound, signatures that are run more than 1-up will contribute more pages, effectively raising the page count for the entire booklet.
Oh, Phooey!
What do you get when you change the binding of your booklet after you've assembled the contents? That depends. If you're converting a wirebound booklet to spiralbinding or GBC, the original contents stay the same. The only thing that changes is the cost for putting it together. But go from a wirebound to a saddlestitched booklet, and you'll find yourself with a bucketful of ominous red bullets. Here is where Morning Flight's automation pays off in a big way.
Say you've quoted a wirebound 8-1/2x11 booklet and the customer now asks you to requote the same booklet, perfectbound.
1.Open the wirebound quote for editing (see Changing a Quote).
2.Click F3. Select Perfectbound, with 1/8" trim on 3 sides. Click OK.
3.Back in the quote window, click F4.
More red flags, but here's the good news. Morning Flight has already removed the back cover. For perfect binding, we need a one-piece wraparound. It has also tagged all invalid content (the buttons glowing in red). To make the process completely painless, the program has gone one step further: All offending pages have been pre-converted in the background, ready for you to accept as is, or modify as you see fit.
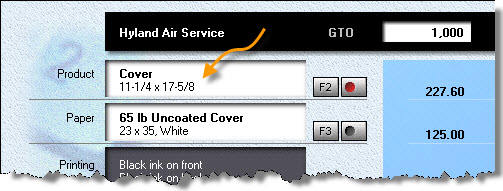
When you click the "Cover" button, you'll note that the size has increased from 8-1/2x11 to 11-1/4x17-5/8, to include trim and spine. What's more, the 8-1/2x11 cut-size paper was replaced with a 23x35 sheet. All that's left for you to do is click OK.
Did I mention Morning Flight takes care of the heavy lifting? I should have mentioned that.
See also